The ABFRealmMapView class inherits from MKMapView. It manages real-time data fetching and displaying annotations for a Realm object subclass that contains coordinate data. In addition, the map view clusters annotations based on zoom level by default.
This allows for the creation of a map with little to no code, via Interface Builder!
You can see the code for ABFRealmMapView on GitHub..
This tutorial uses ABFRealmMapView v1.2.
Overview
Location data plays a big role in building great mobile app experiences. Maps are immersive and users are increasingly demanding highly-responsive experiences.
ABFRealmMapView simplifies creating a dynamic map in your app by utilizing the fast query speed of Realm. You can now implement real-time fetching on map changes and automatic annotation clustering in just a few minutes!
Just store your location data in Realm and then let ABFRealmMapView know the class of objects you want it to display, and the names of their latitude and longitude attributes.
In the tutorial below we will go over how to install ABFRealmMapView, use some sample data, and get this all displayed in your app. Let’s get started!
You can see the final code on GitHub here.
Tutorial
Create a new Xcode project, using the “Single View Application” template. Be sure “Language” is set to Objective-C, and that “Use Core Data” is unchecked.
ABFRealmMapView is available through CocoaPods. (If you don’t have CocoaPods installed, follow their instructions before continuing.) In your terminal, cd to the project folder you just created, and run touch Podfile. To install ABFRealmMapView, simply add the following line to the Podfile you just created:
pod "ABFRealmMapView"
In your terminal, run pod install. This will also install Realm automatically! (If this is your first time using CocoaPods, this could take a while. Future uses will be much faster.)
When it’s done, you’ll need to close the Xcode window and open the xcworkspace file that CocoaPods created, so that you can use the classes inside the pods.
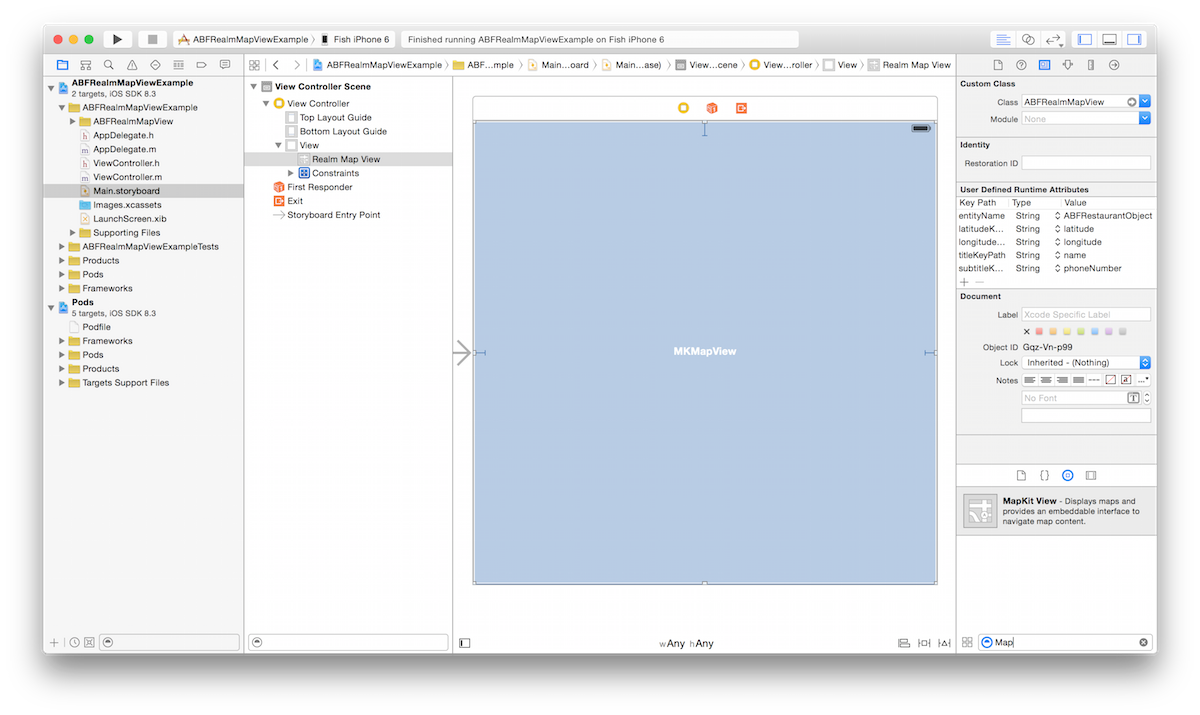
In main.storyboard, add an MKMapView to the view controller, and change its “Class” (in the Identity Inspector, at the top right) to ABFRealmMapView.
Connect your data to the map. For this tutorial, we’ll be using some restaurant data, available here: RealmSFRestaurantData. This includes the locations of all the restaurants in the city of San Francisco. To install it, add the following line to your Podfile:
pod "RealmSFRestaurantData"
and run pod install again.
Adjust the ABFRealmMapView properties to specify the Realm object name and key paths for latitude, longitude, and annotation view title and subtitle. You can change these properties in Interface Builder, as shown in the image below.
| Property | Value |
|---|---|
| Entity Name | ABFRestaurantObject |
| Latitude Key Path | latitude |
| Longitude Key Path | longitude |
| Title Key Path | name |
| Subtitle Key Path | phoneNumber |

In ViewController.m, add this header to the top of the file:
#import <ABFRealmMapView/ABFRealmMapView.h>
#import <RealmSFRestaurantData/SFRestaurantScores.h>
Add an IBOutlet for the ABFRealmMapView from your storyboard to this view controller.
By default, ABFRealmMapView will use the default Realm path, but since we are using data from a different location, we need to set the path to our restaurant data set. Luckily, RealmSFRestaurantData makes this easy by supplying a function to retrieve the path.<p>
<p>In the same file, add the following lines after [super viewDidLoad]:
RLMRealmConfiguration *config = [RLMRealmConfiguration defaultConfiguration];
config.path = ABFRestaurantScoresPath();
self.mapView.realmConfiguration = config;
When that’s done, your ViewController.m file should look like this:
#import <ABFRealmMapView/ABFRealmMapView.h>
#import <RealmSFRestaurantData/SFRestaurantScores.h>

@interface ViewController ()
@property (strong, nonatomic) IBOutlet ABFRealmMapView *mapView;
@end

@implementation ViewController

- (void)viewDidLoad {
  [super viewDidLoad];
  // Do any additional setup after loading the view, typically from a nib.
  RLMRealmConfiguration *config = [RLMRealmConfiguration defaultConfiguration];
  config.path = ABFRestaurantScoresPath();
  self.mapView.realmConfiguration = config;
}
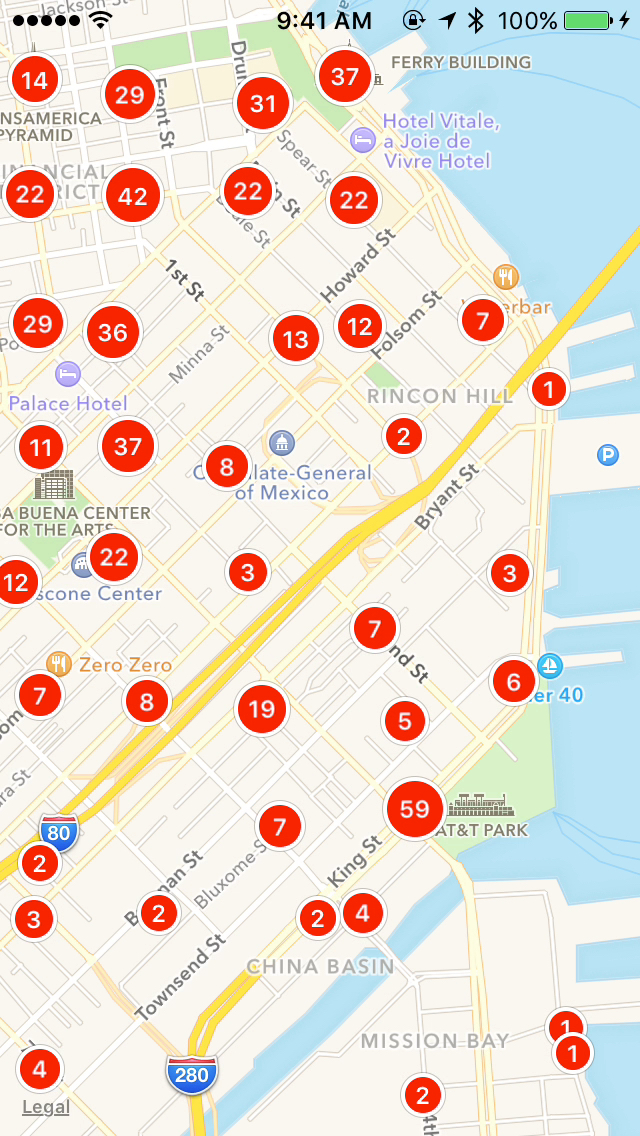
That’s it! Run your app and enjoy the restaurants of San Francisco.
About the content
This content has been published here with the express permission of the author.


